Flexibility could easily be described as both yoga’s blessing and its curse. On the blessing side, increased flexibility is an enormous benefit: it promotes the range of motion and joint health that help prevent back pain, repetitive-use damage, and sports injuries.
However, yoga is a lot more than flexibility. In fact, people that come to yoga with a lot of flexibility must be careful not to rush into advanced poses just because they can. Often, they need to work on their strength to complement all that bendiness, build support muscles, and make sure that they are practising safe alignment.
Fear of flexibility, or, more specifically, a lack of flexibility, also keeps a lot of people out of the yoga sphere. It’s a common misconception that you need to be naturally flexible to even attempt to do yoga. So let’s dispel that myth right now. Shout this from the rooftops: Yoga is not reserved for people who are already very flexible.
If you have tight hips, hamstrings, calves, shoulders, whatever, yoga is exactly what you need. Flexibility is not a prerequisite; it’s a result. The person touching their nose to their knees does not win (at yoga). The person who improves their flexibility safely over time wins (at life!).
WHY FLEXIBILITY IS SO IMPORTANT
Flexibility is a key component of physical fitness. Cardio and strength training are on most people’s radar, but flexibility often isn’t until pain or injury arises. When they do, the treatment frequently involves stretching tight muscles that are limiting range of motion and putting stress on vulnerable areas like the joints.
We must also mention the mental benefits of increasing your flexibility. Flexibility is improved through stretching and stretching feels good. When you stretch, you relieve stress by releasing tension. Where the body goes, the mind follows. When you let go of physical tension, you also let go of mental tension. That’s one of the reasons yoga is so good at reducing stress, alleviating insomnia, and increasing a sense of well-being.

HOW DOES YOGA HELP IMPROVE FLEXIBILITY?
Yoga is different from “just” stretching by virtue of its emphasis on safe form and the duration and variety of stretches that address both major muscle groups and deep-seated stealth muscles you might not even know you have (like the psoas and piriformis). The yoga difference can be described with three ‘A’s: alignment, attention, and awareness.
Alignment is the precise way that each pose is done to maximise its benefits and minimise the risk of injury. This may include using props to support tight areas as they begin to open up. Practising with the insight of alignment helps ensure that you aren’t compromising one area of the body in an attempt to focus on another area. An experienced teacher helps bring alignment to the fore, as does using a yoga mat with alignment guides.
Attention means you are not zoning out or just going through the motions but rather feeling each pose to the fullest. This helps cultivate the body awareness necessary to distinguish between the discomfort that may arise in using your body in a new way and the pain that is the body’s signal to back off. No one else is in your body so only you can make that call.
Awareness means that you remain completely focused on the present moment throughout your practice. Often, the physicality of yoga asana practice is enough to keep us anchored in the now. We also learn to use the breath to return to the body in the present again and again. Awareness is one of yoga’s greatest tools because it takes us out of our monkey mind and allows us to reset, reducing stress and anxiety.
WHAT ARE THE BEST YOGA POSES FOR FLEXIBILITY?
The best yoga poses for flexibility are those that are done regularly. We’ve already mentioned some of the major muscle groups in which many people experience tightness. Hamstrings, hips, and shoulders tend to top the list so the following poses address those areas. Since yoga poses don’t usually work one area in isolation, however, you’ll also get the benefit of stretching the calves, quads, intercostal, and pectorals, just to name a few. When appropriate, we’ve included details on how to adapt the poses with props to make them more accessible and also how to amplify for a deeper stretch. Each pose is described individually but they are sequenced so you can also join them together to make a flow.
RECLINED HAND TO BIG TOE POSE (SUPTA PADANGUSTHASANA)
There are numerous ways to adapt this pose, most notably by using a strap around the instep of the lifted leg. If you don’t have a yoga strap, any belt will do, or just hold the back of your leg. Keeping your leg as straight as possible is the best way to stretch your groins, hips, hamstrings, calves. Don’t worry about how high you can lift your leg.
Instructions
1. Begin by lying on your back with your knees bent and the soles of both feet flat on the floor.
2. Hug your right knee in towards your chest. Either take a yogi toe grip around the big toe or fit a strap around your instep.
3. Extend your right leg straight up toward the ceiling.
4. If you can, extend your left leg along the floor. It’s also ok to keep it bent.
5. Activate both feet (point or flex).
6. A hand on your left thigh can help remind you to keep that hip flat down on the mat.
7. Make sure to keep both the right femur (thigh bone) and the right humours (upper arm bone) settled in their sockets.
8. After five to ten breaths, repeat with the left leg.
EYE OF THE NEEDLE POSE (SUCIRANDHRASANA)
This pose offers a wonderful way to stretch the hip flexors gently at first and then more deeply as flexibility becomes more available. If you are looking for more intensity, you can substitute in Pigeon.
Instructions
1. Lie on your back with your knees bent and the soles of your feet on the floor.
2. Place your right ankle on the top of your left thigh, opening your right knee to the right.
3. Stay here or lift your left foot off the floor and start to bring your left thigh towards your chest. Reach your right hand through the gap between your legs to clasp your hands around the back of your left thigh (or around the front of the left shin).
4. Draw your left knee closer to your chest (which will cause your right knee to move away from your chest) while making sure that your sacrum stays anchored to the floor. You can also use your right elbow to nudge your right knee further away from your chest.
5. Keep both feet active throughout.
6. After five to ten breaths, switch legs.
DOWNWARD FACING DOG (ADHO MUKHA SVANASANA)
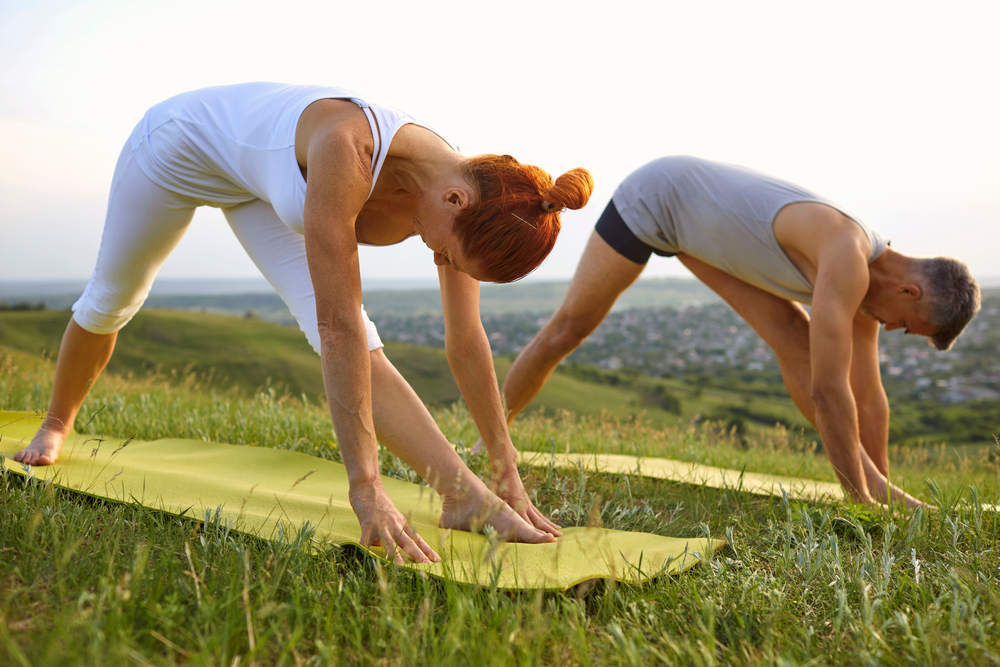
You didn’t think we’d leave out, Downward Dog, did you? This pose is good for everything, particularly stretching the hamstrings and calves along the backs of the legs.
Instructions
1. Come to your hands and knees with the knees slightly behind your hips.
2. Curl your toes under and lift your knees from the floor.
3. Lift your seat to the ceiling by straightening your legs.
4. Pedal your feet one at a time.
5. Settle into relative stillness for a least five breaths while pushing strongly into the palms of your hands and maintaining the inverted V shape of the posture.
CRESCENT LUNGE (ANJANEYASANA)
Consider Anjaneyasana a choose your own adventure type of pose. You can lunge deeply into the front hip or keep it more over the knee. Reaching the arms toward the ceiling also stretches the muscles between the ribs (intercostal). You can try reaching around for your back foot to add a quad stretch if you like. Pick a variation that works for you.
Instructions
1. From Downward Facing Dog, step your right foot forward to the inside of your right hand. Give your foot some help if it doesn’t make it all the way to the front.
2. Lower your left knee to the mat. If you have sensitive knees, a Yoga Pad can make this more comfortable.
3. Inhale to lift your arms overhead. Reach for the ceiling while simultaneously moving your shoulders down away from your ears.
4. For a deeper hip stretch, take your right knee forward a little or a lot.
5. If you want a quad stretch, lift your left heel toward your left glute. Reach your right arm behind your back to catch hold of your left foot or ankle. Draw your foot toward your butt.
6. Stay three to five breaths in your final version of the pose before switching sides.
PYRAMID POSE (PARSVOTTANASANA)
Pyramid gets deep into your hamstrings and hips. Use props as necessary and remember that both hip points face the front of the mat in this posture.
Instructions
1. From Downward Facing Dog, step your right foot to the inside of your right hand.
2. Step your left foot toward the front of your mat about five inches and out to the left side about 3 inches. (Distances may vary depending on your size and flexibility.)
3. Lower your left heel so that your toes are turned out about 45 degrees.
4. Straighten both legs, lifting your hips. If your hands come off the floor, take blocks underneath them.
5. If you need more stability, you can step your left foot farther out to the left side of your mat. Both hips continue to face the front of the mat
6. Inhale to come to a flat back. Exhale to lower your chest toward your right knee.
7. Repeat this process of lengthening on the inhalation and deepening on the exhalation for about five breaths. Then switch sides.

HALF MOON POSE (ARDHA CHANDRASANA)
Half Moon steps things up a bit by incorporating balance but it’s also an exceptional way to open the hamstrings (yet again!), hips, ribs, and chest. If you are more of a beginner, you can substitute Triangle (Trikonasana) pose for a similar stretch with less chance of tipping over. A block also helps make this pose more accessible.
Instructions
1. From Downward Facing Dog, step your right foot to the inside of your right hand.
2. Keep your right knee soft as you take your right hand forward about 5-10 inches (depending on your size). Come up on your right fingertips or bring the block under your right hand.
3. Bring your left hand to your left hip and lift your left foot off the ground as you straighten your right leg.
4. Stack your left hip over your right hip and lift your left leg to parallel to the floor, flexing the left foot.
5. Lift your left arm up to the ceiling and open your chest to the left side.
6. Take your gaze up to your left fingertips.
7. If you want a quad stretch/balance challenge, bend your left knee and take your left heel toward your glutes. Release your left hand and reach behind you to grab your left foot.
8. After around five breaths, try the other side.
CONCLUSION In the end I would like to conclude this article by saying that These poses are a good starting place, but remember that it’s really the whole ‘body and mind’ approach that makes yoga one of the most effective ways to improve your flexibility, as well as so many other aspects of your physical and mental health. The best yoga pose for flexibility is actually all the poses.


